How to Install Artifical Grass
In the past ten years, artificial grass has witnessed a boom in popularity with British householders..
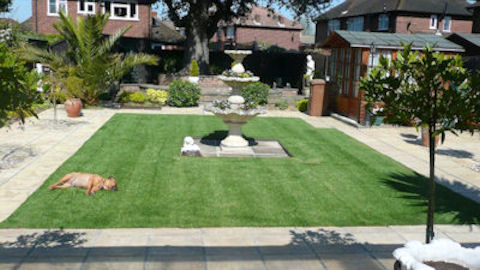
Huge advancements in the manufacturing process have helped it throw off its old image as a brittle and unrealistic looking surface to become a genuinely alternative to the real thing. Low maintenance, child friendly and mud-free, it's not difficult to see the attraction and with the latest generation of fake grasses offering never before seen levels of realism, to both sight and touch, the trend looks set to continue.

Anthony Gallagher is Managing Director of Easigrass, the UK's largest stockist of artificial grass, and gives us his guide to fitting it yourself. It should be pointed out that for the best results, Anthony and Easigrass recommend using a professional fitter.
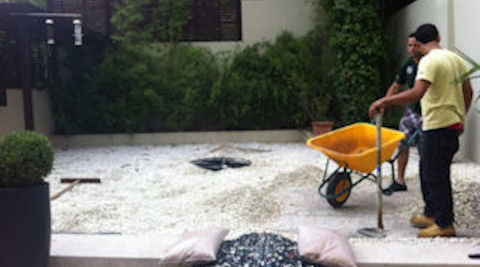
The first step is to prepare a level stable base for your artificial lawn. Remove existing grass with a turf cutter so you have a nice smooth base to work with. If there are any lumps or bumps, now is the time to level these out. You may wish to add a layer of self-levelling compound if the surface is very uneven or you have had to excavate a large amount of soil. The ground will need to be firm and stable, so compact the soil using a vibrating or wacker plate, a roller or the back of a shovel. If you are laying an artificial lawn on to a surface such as concrete or timber, this should be clean and free from any debris.
You may opt to lay the edges of your artificial lawn under paving stones to help keep it in place. Alternatively, you might require perimeters, which should be made of tanalised timber. Place stakes into the ground and screw your perimeter wood securely to these.
Correct preparation of the base is essential in order to avoid problems with your artificial lawn later on. Treat the entire area thoroughly with weedkiller, and then cover the base with a weed barrier. At Easigrass we use a specially designed geo-textile membrane for this first layer, which will stop weeds from growing up through your artificial lawn and also helps to prevent worm holes.

Next, cover the membrane with a layer of fine aggregate or grit sand to ensure the surface is as level as possible. The final stage in preparing the base is to cover the area with a layer of shock-pad cushioning. This will make the grass feel springier underfoot, as well as help to protect your new lawn from the hard base beneath.
When your base is thoroughly prepared, you can begin to lay the actual lawn. There are a number of different types to choose from, offering a range of different colours and grass heights. Whichever you choose, it is vital to ensure that you lay all the rolls in the same direction. You may find it a good idea to lay weights across seams you have put in place to avoid the grass slipping as you move each roll into place. Once the rolls are in position, trim off the excess around the edge with a sharp Stanley knife, leaving between 10 and 15 centimetres spare in case you need to adjust the position later. Leave the grass to settle for a couple of hours to make sure it is fully flat and to avoid creasing later.
You are now ready to trim and seal your artificial grass. If you wish, lightly tack the perimeter of the grass in place whilst you secure the internal seams. To set the seams, carefully lift them up and lay seaming tape below the join. Apply an appropriate all-weather adhesive to this before gently laying the grass edges back down on to the tape, working from one side to the other. Once you are happy with the positioning, apply weights or walk up and down the seam to help it stick. Once all internal seams are set, you can move back to the perimeters. Apply tension to the grass and secure to your chosen boundary, placing the grass under paving slabs or bailing over or under your wooden perimeter. Once secure, trim off the last of the selvedge.

Dressing or stabilising is done by applying a layer of silica sand to the grass and should be done on a dry day. Spread the sand evenly over the lawn in a fine layer before working into the base with a stiff brush. This sand not only helps to weigh down the lawn, but also keep the tufts of grass upright.
Although your artificial lawn will not require watering or mowing, there are a few steps to take to keep it looking good all year round. Once a month you will need to brush the lawn to clear away dirt and debris. This helps to prevent blade compaction and encourages the pile to remain upright and plush. For the best results, brush your artificial lawn using a soft-bristle brush. Any animal mess should be cleared away immediately and the grass rinsed with hot water and detergent. Autumn requires a bit of extra maintenance as fallen leaves left on the artificial surface can rot and cause moss to grow, as well as having an effect on drainage, so these should be removed on a regular basis.
Most artificial lawns come with a guarantee of between eight and ten years, but with the correct aftercare many last up to twice as long as this.
Anthony Gallagher is managing director of Easigrass, suppliers and UK-wide installers of artificial grass. All images courtesy of Easigrass.For videos on self-installation you can visit the Easigrass YouTube channel


